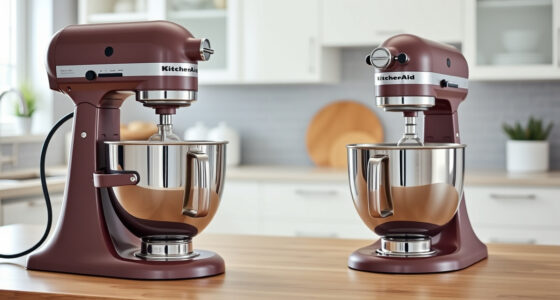

If your KitchenAid Artisan Series 5 Quart Tilt Head Stand Mixer is making a grinding noise, it can indicate a mechanical issue that needs attention. A noisy mixer not only disrupts your baking but may also cause further damage if left unchecked. Fortunately, many common problems are simple to diagnose and fix with the right steps. This guide provides detailed instructions to troubleshoot and resolve grinding noises, keeping your mixer running smoothly for years to come.

Get kitchen gear delivered free — and shop member deals
- Fast, free delivery on millions of items
- Access to Prime Big Deal Days deals on October 6–7
- Prime Video, Amazon Music and more included
Before starting, ensure your mixer is unplugged to avoid any electrical hazards. Gather basic tools like a screwdriver, a soft brush, and possibly replacement parts if needed. Patience and careful handling are key to safely restoring your mixer’s performance.
Key Takeaways
| Common Cause | Worn or damaged gears are often behind grinding noises. |
| Safety First | Always unplug your mixer before working on it. |
| Step-by-Step Fix | Disassemble, inspect, clean, and replace parts if needed. |
| Preventative Tips | Regular cleaning and proper use extend your mixer’s lifespan. |
| When to Seek Help | If unsure, consult a professional or contact KitchenAid support. |
Identify the Source of the Grinding Noise
Start by listening carefully to pinpoint where the grinding sound originates. It could come from the gear housing, the drive shaft, or the attachment hub. Unplug the mixer and remove the attachment (like the flat beater or dough hook). With the mixer unplugged, rotate the attachment hub by hand; if you notice resistance or a grinding feeling, the issue is likely within the gear assembly or drive mechanism.
Check for visible damage, such as worn gears, chipped teeth, or debris lodged inside the gear housing. Sometimes, accumulated food particles or dust can cause abnormal noise, so inspect the area thoroughly. Identifying the specific source helps target your repair efforts effectively.
Disassemble the Mixer Carefully
- Remove the mixer bowl and attachments to access the gear housing.
- Using a screwdriver, unscrew the screws securing the top or side panels of the mixer housing. Refer to your model’s user manual if needed.
- Gently lift off the panel, taking care not to damage any wiring or internal components.
- Inspect the gears, drive shaft, and other moving parts for signs of wear, cracks, or missing teeth.
Keep track of all screws and small parts to ensure proper reassembly. If you notice damaged gears, replacing them is essential for smooth operation.
Clean and Lubricate Moving Parts
Sometimes, grinding noises are caused by dirt, dust, or lack of lubrication. Use a soft brush or cloth to remove debris from the gears and drive shaft.
If your model allows, lightly apply a food-grade, high-quality lubricant to the gear teeth and moving parts. Avoid over-lubricating, as excess oil can attract dirt and cause further issues. Regular cleaning and lubrication extend the lifespan of internal components and reduce noise.
Replace Worn or Damaged Components
If inspection reveals worn or broken gears, you’ll need to replace these parts. You can order genuine replacement gears or internal components from KitchenAid or authorized parts suppliers. Carefully remove the damaged gears, noting their orientation and placement. Install the new parts, ensuring they mesh properly with adjoining components.
Reassemble the housing in reverse order, making sure all screws are tightened securely. Reinstall the attachment and run the mixer at low speed to test for noise and smooth operation.
Test and Final Checks
After reassembly, plug in your mixer and run it at various speeds, especially the higher settings. Listen for any grinding sounds and check for smooth, quiet operation. If noise persists, recheck the gear alignment and ensure all parts are properly secured.
Persistent issues may indicate internal damage beyond simple repair, in which case contacting a professional or KitchenAid support is advisable. Regular maintenance, like cleaning and cautious use, can prevent future problems.
The Products in This Guide

KitchenAid Artisan Series 5 Quart Tilt Head Stand Mixer
- ✔ Model: KSM150PS
- ✔ Includes: Pouring shield, Milkshake
- ✔ Bowl Material: Stainless Steel

KitchenAid Stand Mixer Attachment
- ✔ Compatibility: All KitchenAid mixers
- ✔ Attachment Type: Food grinder
- ✔ Included Accessories: Sausage tubes
KitchenAid Artisan Series 5 Quart Tilt Head Stand Mixer
The KitchenAid Artisan Series 5 Quart Tilt Head Stand Mixer is renowned for its durability and versatility. Built with a sturdy metal construction, it offers 59 touchpoints for thorough mixing, and its tilt-head design provides easy access to the bowl. With 10 speeds, it handles a wide range of recipes efficiently. Regular maintenance can keep this mixer functioning smoothly for years.
Pros:
- Durable metal construction
- Tilt-head for easy access
- 10-speed options
- Large 5-quart stainless steel bowl
Cons:
- Can be heavy to move
- Gears may wear over time
- Requires regular cleaning
Best for: Home bakers who need a reliable, versatile mixer for various recipes
Not ideal for: Professional kitchens needing industrial-grade equipment
Bottom line: A durable, versatile stand mixer built for consistent baking performance.
KitchenAid Stand Mixer Attachment
The KitchenAid Stand Mixer Attachment Food Grinder allows you to process meats, vegetables, and more with ease. Connecting to the mixer’s power hub, it offers multiple grinding plates and sausage stuffer tubes, making it a versatile addition for home chefs. It’s ideal for creating fresh, customized foods and reducing prep time.
Pros:
- Multiple grinding plates included
- Sturdy metal construction
- Easy to attach and clean
- Enhances mixer functionality
Cons:
- Requires separate purchase
- Can be bulky to store
- Needs pre-chilling for best results
Best for: Home cooks wanting to make fresh ground foods and sausages
Not ideal for: Heavy-duty commercial processing
Bottom line: A powerful attachment to expand your KitchenAid mixer’s food prep options.
Frequently Asked Questions
Why is my KitchenAid mixer making a grinding noise?
The grinding noise is often caused by worn or damaged gears inside the gear housing, debris lodged in the mechanism, or lack of lubrication. It’s important to inspect and clean these parts regularly.
Can I fix the grinding noise myself?
Yes, many issues can be fixed by disassembling the gear housing, cleaning, lubricating, or replacing worn gears. However, if you’re unsure or uncomfortable, seeking professional repair or contacting KitchenAid support is recommended.
How often should I clean and maintain my mixer?
Regular cleaning after use and periodic inspection of internal parts can prevent many issues. Lubricate moving parts as recommended in your user manual, typically every few months.
Is it safe to disassemble my KitchenAid mixer?
Only disassemble your mixer if you have unplugged it and feel confident in your mechanical skills. Follow the manufacturer’s instructions carefully to avoid damaging internal components or voiding the warranty.
When should I replace internal parts?
Replace gears or other internal components if they show signs of wear, cracks, or missing teeth. Persistent noise or difficulty in operation indicates a need for replacement.
Keep Your KitchenAid Mixer Running Smoothly
Maintaining your KitchenAid Artisan stand mixer is key to ensuring it performs at its best for years to come. Regular cleaning, gentle use, and prompt attention to unusual noises like grinding can prevent costly repairs. When issues arise, following these troubleshooting steps can help you resolve common problems safely and effectively. Remember, if you’re ever in doubt, professional repair services or KitchenAid support are excellent resources to keep your mixing experience hassle-free.
Affiliate disclosure: As an Amazon Associate we earn from qualifying purchases. Prices and availability are accurate as of the time of publishing.
Evergreen bestsellers Picks
bestsellers
As an affiliate, we earn on qualifying purchases.