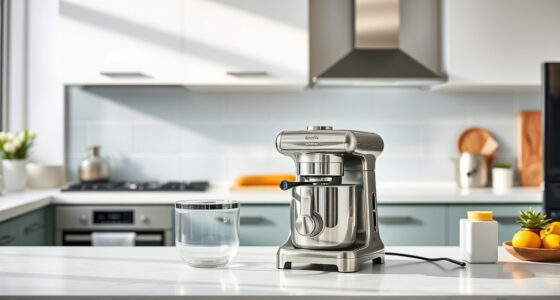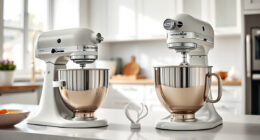

Getting your new KitchenAid Artisan Series 5 Quart Tilt Head Stand Mixer ready for use is straightforward, but it’s important to follow proper setup procedures to ensure safety and optimal performance. Whether you’re a first-time user or need a refresher, this guide will walk you through each step clearly and practically.
From unpacking to attaching accessories, you’ll learn everything you need to know to enjoy your mixer and start baking or cooking with confidence.
Key Takeaways
| Assembly Clarity | Clear, step-by-step instructions for setup. |
| Safety First | Proper handling and assembly tips to prevent accidents. |
| Accessory Use | How to attach and use optional accessories. |
| Maintenance Tips | Keeping your mixer in top condition for long-term use. |

KitchenAid Artisan Series 5 Quart Tilt Head Stand Mixer with Pouring Shield KSM150PS, Milkshake
Built to take it all on with the durable and built-to-last metal construction, and 59 touchpoints around the...
As an affiliate, we earn on qualifying purchases.
Unboxing and Initial Inspection
- Carefully remove the mixer from its packaging, making sure all components are accounted for, including the 5-quart stainless steel bowl, pouring shield, and any accessories.
- Inspect the mixer for any shipping damage or missing parts. Check that the tilt-head mechanism moves smoothly and that the power cord is intact.
- Read the user manual thoroughly to familiarize yourself with the mixer’s features and safety warnings.

KitchenAid Stand Mixer Attachment, Food Grinder KSMMGA, Metal Food Grinder
Connect to any household KitchenAid Stand Mixer power hub and use the power of the motor to run...
As an affiliate, we earn on qualifying purchases.
Assembling the Mixer
- Place the mixer on a stable, flat surface near an outlet.
- Lift the tilt-head lever to raise the head of the mixer, exposing the attachment hub.
- Attach the flat beater, wire whip, or dough hook by aligning it with the hub and turning clockwise until it clicks into place.
- Lower the tilt-head until it locks securely into position.
- Place the stainless steel bowl onto the base, aligning the notches, and turn it clockwise to lock it in place.
Connecting and Testing
- Plug the mixer into a grounded electrical outlet.
- Turn the speed control dial to the lowest setting (stir) to test the attachment and motor operation.
- Slowly increase speeds to ensure the attachments run smoothly and without unusual noise or vibration.
- Check that the tilt-head locks securely in place during operation.
Using Optional Attachments
To expand your mixer’s capabilities, you can attach accessories like the food grinder or pasta roller. Attach these to the power hub following the specific instructions for each accessory. Ensure the mixer is unplugged before attaching or detaching accessories.
Pre-chill attachments like the grinder for cleaner, more efficient grinding results, and clean attachments with a damp cloth or brush, avoiding submersion unless specified.
Maintenance and Troubleshooting
- Keep the mixer clean by wiping down the exterior with a damp cloth. The stainless steel bowl and attachments are dishwasher safe.
- If the mixer makes unusual noises or vibrates excessively, turn it off and check that attachments are correctly installed and the bowl is properly seated.
- Periodically check the power cord and plug for damage.
- For persistent issues, consult the manual or contact Customer Support.
The Products in This Guide

KitchenAid Artisan Series 5 Quart Tilt Head Stand Mixer
- ✔ Voltage: 110-120V
- ✔ Warranty: 1 year limited
- ✔ Included Accessories: Flat beater, wire whip, dough hook

KitchenAid Stand Mixer Attachment
- ✔ Weight: 4 pounds
- ✔ Warranty: 1 year
- ✔ Color: Metal finish
KitchenAid Artisan Series 5 Quart Tilt Head Stand Mixer
The KitchenAid Artisan Series 5 Quart Tilt Head Stand Mixer combines durable metal construction with powerful performance, making it a reliable choice for both casual bakers and serious chefs. Its tilt-head design offers easy access to the bowl, simplifying ingredient addition and cleaning. With 10 speeds and a capacity that can handle large batches, this mixer is versatile and built to last.
Pros:
- Durable metal construction
- Easy tilt-head access
- Multiple speed options
- Large 5-quart bowl
- Dishwasher safe components
Cons:
- Relatively heavier than some models
- Attachments sold separately
- May be noisy at higher speeds
Best for: Baking enthusiasts and home chefs needing a reliable, versatile mixer.
Not ideal for: Small kitchens with limited counter space or those on a tight budget.
Bottom line: A durable, versatile mixer that makes baking and cooking easier.
KitchenAid Stand Mixer Attachment
The KitchenAid Metal Food Grinder attachment expands your mixer’s functionality, allowing you to grind meats, vegetables, and more with ease. Its durable construction and included grinding plates and sausage tubes make it a versatile tool for home cooks who love fresh, homemade ingredients.
Pros:
- Sturdy metal build
- Multiple grinding plates
- Includes sausage stuffer tubes
- Large food tray
Cons:
- Attachment sold separately
- Requires pre-chilling for best results
- Adds some complexity to setup
Best for: Home cooks wanting to grind fresh ingredients and make sausages.
Not ideal for: If you prefer simpler setups or mainly bake.
Bottom line: A durable, efficient attachment for fresh grinding needs.
Frequently Asked Questions
How do I attach accessories to my KitchenAid mixer?
Attach accessories to the power hub located at the front of the mixer. Align the attachment with the hub and turn clockwise until secure. Always unplug the mixer before attaching or removing accessories.
Can I use the mixer while the tilt-head is raised?
For safety reasons, it’s recommended to tilt the head back only when the mixer is turned off and unplugged. During operation, keep the head locked in the down position.
How do I clean the mixer and its components?
Wipe the mixer body with a damp cloth. The stainless steel bowl and attachments are dishwasher safe, but hand washing is recommended for longevity. Avoid immersing the mixer body in water.
What should I do if the mixer is not turning on?
Check that the mixer is properly plugged in and the power outlet is working. Ensure the tilt-head is fully lowered and the speed control is set correctly. If problems persist, consult the manual or contact support.
Are replacement parts available?
Yes, original replacement parts such as bowls, attachments, and accessories are available through authorized retailers and KitchenAid service centers.
Your KitchenAid Mixer Ready for Action
Once your mixer is properly assembled and tested, you’re all set to start baking, mixing, and creating delicious dishes. Proper setup ensures safety, longevity, and the best possible results. Enjoy experimenting with different recipes and optional attachments to unlock your culinary potential!
Affiliate disclosure: As an Amazon Associate we earn from qualifying purchases. Prices and availability are accurate as of the time of publishing.